Hi, everyone! I’m Shohei Kameoka, environmental artist at PlatinumGames. I created visuals for the Astral Plane, as well as the holograms you see on the Ark, in ASTRAL CHAIN.
One of the most appealing parts of ASTRAL CHAIN is its urban, near-future sci-fi setting. Nothing says “near-future city” like holograms, right? And if you want your holograms to look good, you’ve got to keep them moving! To create those hologram animations, I made heavy use of a technique called “UV Animation.” UV animation is a well-worn technique at this point, but that doesn’t mean it isn’t versatile! In this blog, I’d like to show off a few of its uses in ASTRAL CHAIN.
But before that, I should probably tell you just what UV animation is!
What is UV Animation?
Actually, let’s take one more step back – what are UVs?
The three-dimensional objects that you see in games are made up of two major parts: The 3D model itself; and textures, 2D images that determine what their surfaces look like. A UV map determines which part of the texture falls on which part of the model when they’re put together. Here’s a simple example:.
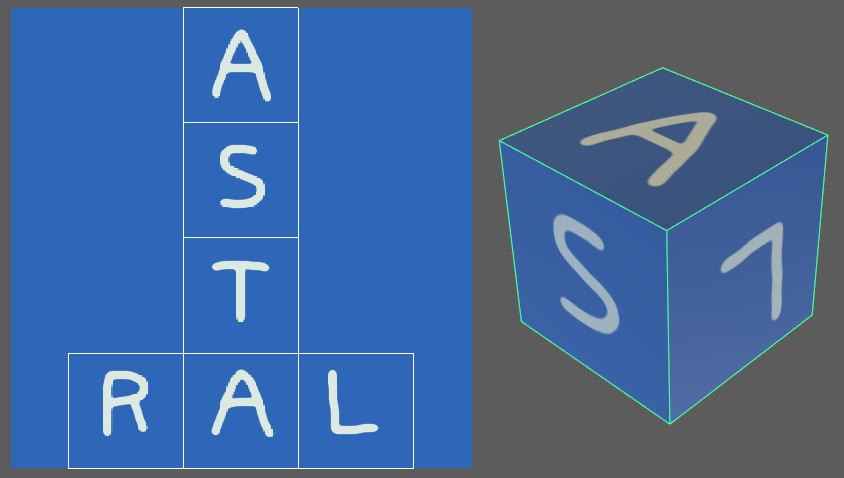
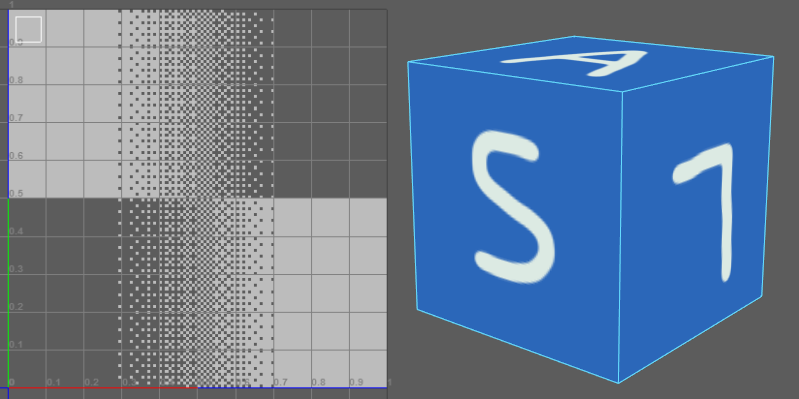
UV animation, then, is the process of moving these UVs around, which in turn changes the texture’s position on the 3D model. This is easier to show than to tell, so check out this clip and you’ll see what I mean. Watch what happens to the cube on the right, as I move the UV map on the left:
See? Less complicated than it sounds, right? Okay, now that you’ve got that down, let me walk you through the creation of a hologram, just like the ones you see in ASTRAL CHAIN!
Making a Hologram
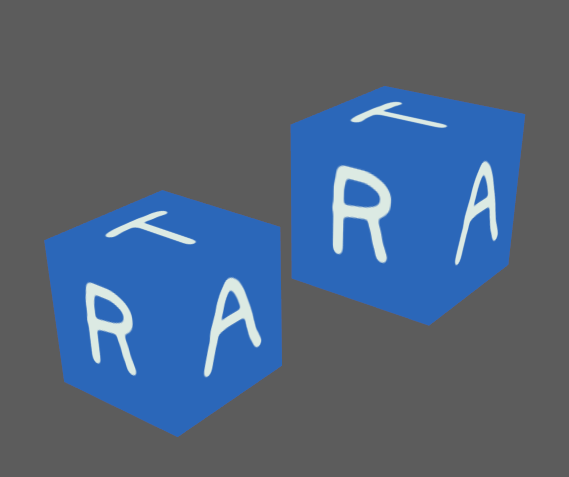
If you’ve played ASTRAL CHAIN, you may recognize this hologram from your visit to Ark Mall. Like pretty much everything else in Ark Mall, this hologram sign has seen better days; it glitches, blurs and jumps to the side erratically. These effects were created with UV animation! Let’s go back to the 3D cube from the UV animation explanation and make it into a glitched-out hologram like this one.
Step One:
First, we make a new texture, separate from the one with the “ASTRAL” lettering on it. This new texture is called a mask – it determines how much of another texture is hidden or shown. We’ll put this mask in the upper half of our texture image.
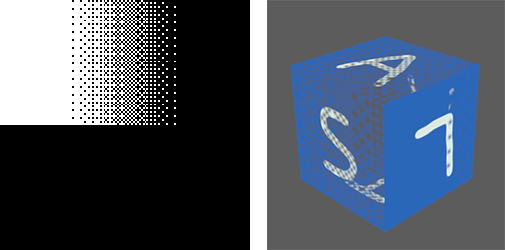
Right: Our 3D model with the “ASTRAL” texture and the mask applied. Notice the new transparency?
Step Two:
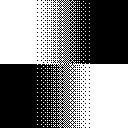
Now, we add the lower half of the mask texture, so that it covers the entire texture area.
Step Three:
Now it’s time to focus on our 3D model and generate a UV map for the mask texture.
Step Four:
We project the mask texture’s UV map on the Z-axis. As it is now, the UV map covers the whole mask texture, so the entire mask is applied. We’ll change this in a second.

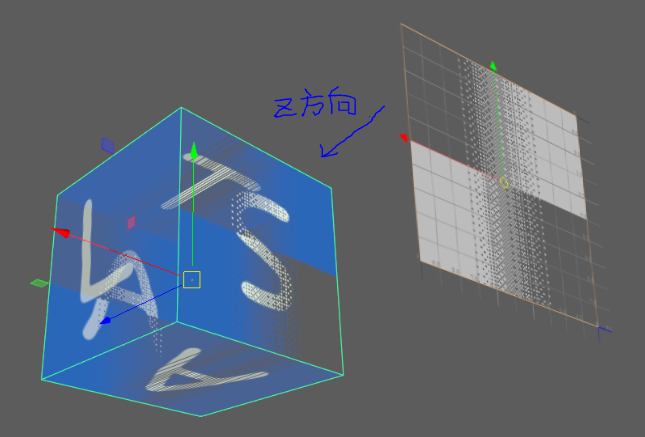
Below: How the model looks with the mask applied as so.
Step Five:
We shrink the UV map down so that the whole “ASTRAL” texture is covered by the white region of the mask. That means it’s all visible, remember?
Step Six:
Now, we copy the 3D model, and move it off to the side, so that it’s roughly offset from the original position.
Step Seven:
We take the UV map for the new copy of the model and move it down, so that it’s all in a black mask region. This makes the “ASTRAL” texture on the copy completely transparent.
Step Eight:
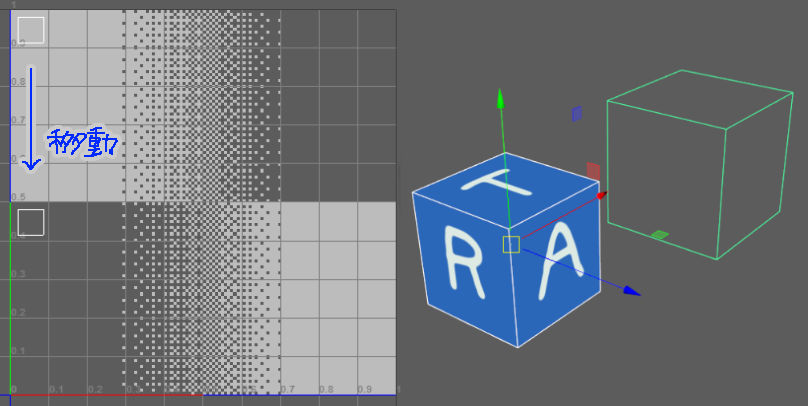
Let’s select the UVs for both cubes and see what happens when we move them around the mask a bit…
Can you see how, due to how we’ve set up the mask, it looks like one cube fades out while the other fades in, like a jumpy, glitchy display? This is a simplified version of the effect on the hologram sign I showed you earlier, but the principle is exactly the same!
There are a few more environmental details that use UV animation in ASTRAL CHAIN…
Neuron Logo
Our UI artists designed this logo for task force Neuron and came up with the concept for the animation. UV animation made it happen!
IRIS Hologram Frames
These frame effects draw your attention to important clues when you’re looking around with your IRIS. When they blink in and blink out, that’s UV animation at work.
Fancy Neon Signs
The elaborate blinking patterns that draw your eyes towards neon signs throughout the Ark are – you guessed it – UV animation!
???
You’ll have to play the game to find out what’s up with this mysterious figure in the Astral Plane. But one thing I can tell you here is that it’s UV animation making them glitch and flicker like that.
Now that you know what to look for, I hope you have fun trying to spot more UV animation effects on the Ark. Thanks for reading!
 Shohei Kameoka
Shohei Kameoka joined PlatinumGames in 2009. Since then, he’s worked on NieR:Automata as a lighting artist, and Vanquish, Anarchy Reigns and Bayonetta 2 as an environment artist. He specializes in creating unique, eye-catching background effects for game environments.